How to Choose the Right Pulverizing Bowl?
Choosing the right Pulverizing Bowl is a sample-quality decision, not merely a purchasing task. The bowl controls particle reduction, contamination risk, heat generation, and operator consistency. A polished agate bowl may protect trace-element integrity, while zirconia or tungsten carbide can provide greater wear resistance. The correct choice depends on the sample, target fineness, and analytical method.
Laboratory standards support this careful approach. ISO 11464:2006 requires controlled soil pretreatment, including drying, crushing, and homogenization. ASTM C702/C702M emphasizes representative sample reduction before testing. These standards show why bowl material and cleaning procedures matter. A bowl that introduces iron, chromium, or silicon can distort results, especially in XRF, ICP-OES, and geochemical analysis. The U.S. EPA’s SW-846 methods also stress representative preparation for reliable chemical testing. Small preparation errors can become large reporting problems.
Start with the sample’s hardness, moisture, abrasiveness, and contamination sensitivity. Then compare bowl materials, usable capacity, impact resistance, cleaning time, and replacement cost. Consider the mill’s speed and pressure, too. A heavy bowl may improve grinding stability but reduce handling comfort. A harder bowl may last longer, yet it can create costly cross-contamination if poorly maintained. No bowl is perfect. That is the part many buying guides overlook. Reviewing ISO/IEC 17025 laboratory competence principles can strengthen traceability, maintenance records, and method validation. The best Pulverizing Bowl is the one that protects the result, survives the workflow, and fits the laboratory’s actual risk profile.
Define the Sample: Hardness, Feed Size, Moisture, and Chemical Reactivity
How to Choose the Right Pulverizing Bowl?
Define the sample before selecting a pulverizing bowl. Hardness determines the required impact and abrasion resistance. Quartz measures 7 on the Mohs scale, so quartz-rich material can rapidly wear unsuitable surfaces. The US EPA SW-846 Method 3050B recommends grinding solid samples to pass a 1 mm sieve when feasible. Oversized pieces create uneven pressure and may leave an unprocessed core. Reduce them first.
Moisture changes the process. Wet material can smear across the bowl, form compact lumps, and block fine gaps. However, a dry sample is not always better. ISO 11464 limits soil drying to 40°C when heat-sensitive compounds may be affected. Measure moisture before grinding, not after guessing. A practical check is simple: squeeze a small portion with a clean tool and inspect clumping.
Chemical reactivity deserves equal attention. Acidic, alkaline, oxidizing, or salt-rich samples may react with bowl surfaces and contaminate later tests. Select a chemically compatible material, then document cleaning and blank results. The NIST Handbook 44 emphasizes traceable measurement practices, yet sample preparation still receives less attention than instrument calibration. That is a mistake. In my experience, feed size and moisture often explain inconsistent particle sizes before equipment failure does. Leave room for doubt. Recheck the sample history, especially when results look unusually clean.
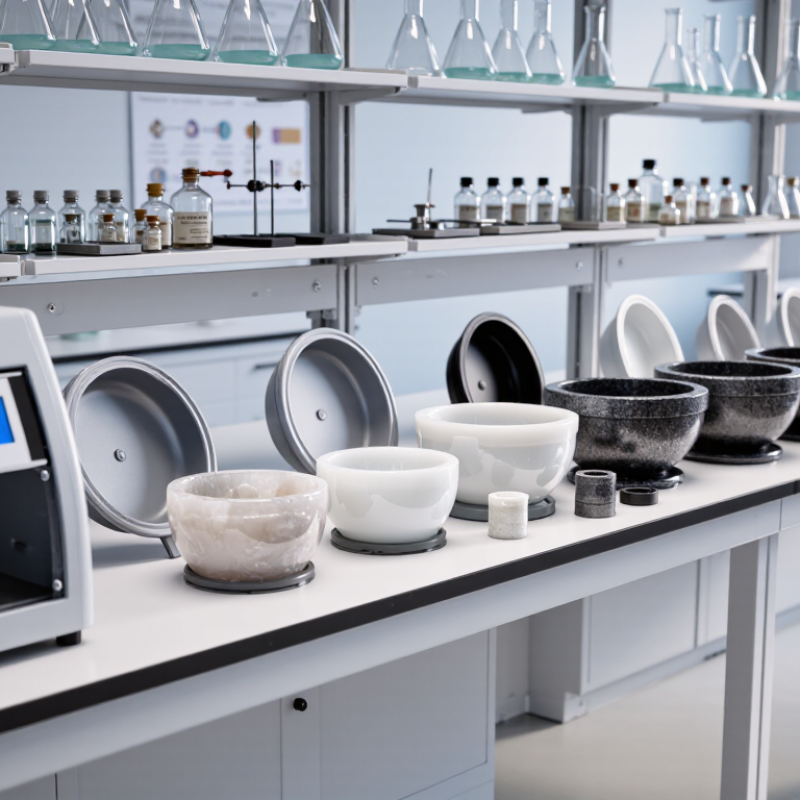
Compare Bowl Materials by Mohs Hardness: Agate 7, Zirconia 8.5
How to Choose the Right Pulverizing Bowl?
Material hardness directly affects wear, contamination, and grinding consistency. Agate is commonly rated around Mohs 7, while zirconia is often listed near Mohs 8.5. These are practical reference values, not linear measurements. A score of 8.5 does not mean zirconia is only 21% harder than agate. The Mohs scale ranks scratch resistance by comparison. ASTM C1327-15(2020) and ISO 14705:2016 use Vickers testing for advanced ceramics, so technical certificates may show different hardness values. Always check the supplier’s test method.
In routine sample preparation, agate works well for softer minerals, pigments, and geological powders. Its smooth surface can reduce cross-contamination, but repeated impact may create chips or fine fragments. Zirconia offers greater abrasion resistance for harder samples, especially when long grinding cycles are required. However, its performance depends on stabilizer content, grain size, and manufacturing quality. Harder is not automatically better. A brittle sample may still damage the bowl if operators apply excessive pressure. I have found that overloading is an easy mistake, even in careful laboratories.
Tips: Match the bowl to the sample, not only its Mohs value. Use small batches and steady pressure. Inspect the inner wall after every run. If white or colored particles appear, stop and clean the setup. Record bowl material, batch size, grinding time, and visible wear. That record may reveal a problem before test results drift.
Control Contamination Through Wear Rates, Cleaning, and ASTM-Compatible Testing
How to Choose the Right Pulverizing Bowl?
A pulverizing bowl affects more than particle size. Its wear rate can change sample chemistry, especially during repeated grinding. Hard, abrasive materials may release trace metals from the bowl surface. Softer samples can retain residue in scratches and corners. Choose a bowl material that matches the sample’s hardness, sensitivity, and testing purpose. Record its service hours and inspect it under strong light. A dull surface, uneven wall, or fine metallic dust deserves attention. Replace it before contamination becomes a hidden variable.
Cleaning needs a defined routine, not a quick wipe. Remove loose powder with a clean brush, then follow a validated washing and drying procedure. Never assume visual cleanliness proves chemical cleanliness. A blank grinding cycle can reveal carryover between samples. ASTM-compatible testing also requires consistent preparation, because particle size and moisture can influence results. Use reference materials or control samples at planned intervals. Document bowl condition, cleaning steps, and unusual noise or vibration. The method may look perfect on paper, yet operators can still miss residue beneath a seal. That weakness should be reviewed honestly.
Tips: Keep separate bowls for high-risk materials when practical. Avoid abrasive cleaning tools that create new grooves. Compare blank results after changing bowl materials. If contamination trends upward, pause production and investigate wear, cleaning, and sample order together. Small records matter.
Verify Particle-Size Targets from 10–100 μm Before Final Bowl Selection
How to Choose the Right Pulverizing Bowl?
Verify Particle-Size Targets from 10–100 μm Before Final Bowl Selection
Particle size should guide bowl selection, not appear as an afterthought. A target of 10–100 μm can hide important process differences. Define the acceptable range for your actual sample first. Record moisture, hardness, density, and starting size. These details influence impact, friction, heat, and contamination risk. In practical testing, I compare several bowl materials using identical sample masses and operating times. A fine ceramic bowl may reduce metallic contamination. A hardened metal bowl may handle tough, abrasive materials more efficiently. However, neither choice guarantees the required distribution.
Not every sample behaves neatly. Some materials smear instead of fracturing. Others collect near the bowl wall and remain visibly coarse. My early trials sometimes focused too heavily on the median size. That was a mistake. A median near 50 μm can still include unwanted particles above 100 μm. Before final selection, use a calibrated sieve method or validated particle-size analysis. Check the complete distribution, not one attractive number. Run repeated tests with fresh portions and inspect the bowl after each cycle. Look for residue, scratches, color transfer, and temperature increase. One successful run proves little. If results vary, adjust the bowl geometry, sample load, or pulverizing time before changing materials. Document every setting, including cleaning steps and operator handling. This record supports reliable decisions and makes later troubleshooting less subjective.