
BLOG

What Is Plastic Injection Molding and How Does It Work?

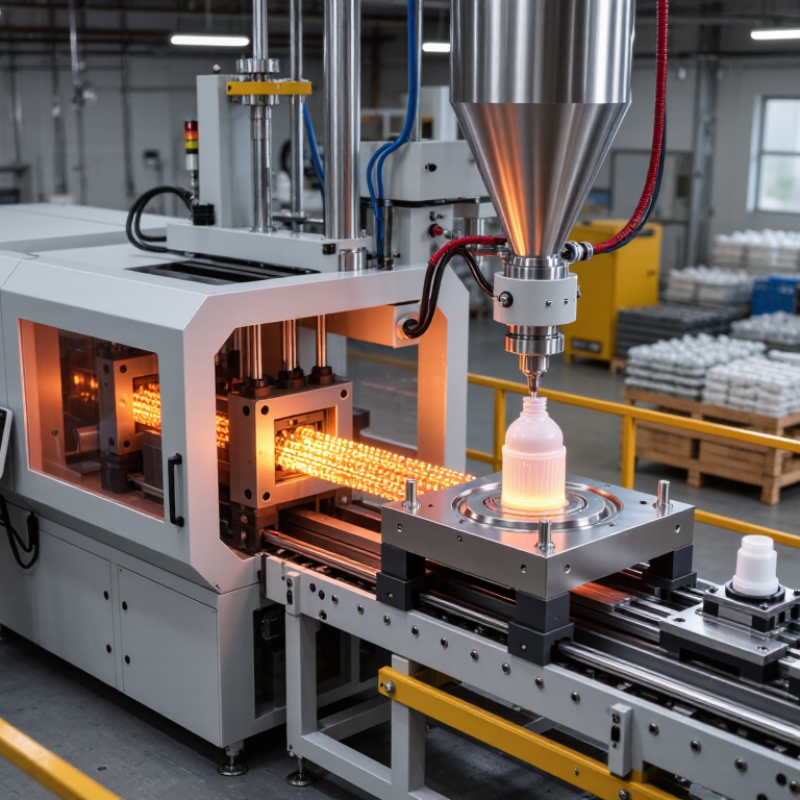
Plastic injection molding is a widely used manufacturing process for producing consistent plastic parts at scale. It starts with heat. Small plastic pellets enter a heated barrel, where rotating screws soften and mix the material. The molten plastic then moves into a carefully designed mold under high pressure. Inside the cavity, it takes the shape of products such as bottle caps, medical housings, automotive clips, and appliance panels. After cooling, the mold opens, and ejector pins release the finished part.

Understanding plastic injection molding requires more than watching a machine cycle. Material selection, mold design, temperature control, injection speed, and cooling time all influence the final result. A few degrees can change shrinkage, surface texture, or dimensional accuracy. Thin walls may fill unevenly. Trapped air can leave visible burn marks. Poorly placed gates can create unwanted weld lines. These details matter in real production environments, where repeatability affects cost, quality, and customer confidence.

The process appears simple from the outside. It is not. Engineers must balance part strength, appearance, cycle time, tooling expense, and environmental considerations. Recycled content may reduce material impact, but it can also change flow behavior and consistency. Even experienced teams review test parts carefully because simulations cannot predict every factory condition. This guide explains how plastic injection molding works, from pellet preparation to part ejection, while examining its equipment, advantages, limitations, and common defects. Some applications demand different methods, so injection molding should not be treated as the answer to every manufacturing problem.
What Is Plastic Injection Molding and How Does It Work?

What Plastic Injection Molding Is and What It Produces

Plastic injection molding is a manufacturing process for producing repeated plastic parts with consistent dimensions. Heated resin enters a metal mold under controlled pressure. The mold shapes the material, then cooling makes the part rigid. This process produces bottle caps, medical housings, appliance panels, toys, automotive clips, and many industrial components. It can create tiny details, ribs, threads, and smooth surfaces in one cycle. Production teams select thermoplastics according to strength, flexibility, heat resistance, and intended contact conditions. Material choice matters more than many beginners expect.

A typical cycle includes mold closing, injection, packing, cooling, and ejection. Sensors can track pressure and temperature, but skilled technicians still inspect samples. Warping, sink marks, flash, and short shots may reveal poor settings or weak mold design. The machine does not automatically guarantee quality. Parts may leave the mold ready for use, or they may need trimming, printing, assembly, or testing. Molding suits high-volume production because the cycle repeats quickly after development costs are managed. For very small batches, another process may be more practical.

Tips: Check wall thickness before finalizing the mold. Uniform walls usually cool more evenly. Add draft angles to support clean ejection. Avoid sharp internal corners when possible. Review several trial parts, not just one. No process is perfect, and small defects can expose larger design assumptions. Keep material records, machine settings, and inspection results for reliable production decisions.

How the Main Components of an Injection Molding Machine Work

What Is Plastic Injection Molding and How Does It Work?

An injection molding machine turns heated plastic pellets into precise molded parts. The hopper stores pellets before feeding them into the heated barrel. Inside, a rotating screw moves, mixes, and gradually melts the material.

The screw has three practical jobs: conveying, melting, and pressurizing. Heater bands warm the barrel, while screw friction adds controlled heat. At the front, molten plastic collects before injection. A hydraulic or electric drive then pushes the screw forward. This pressure fills every cavity in the mold.

Pressure matters greatly.

The clamping unit holds the mold halves together during filling and cooling. Its force prevents flash, which is a thin unwanted edge around the part. Cooling channels carry water through the mold, removing heat from the plastic. After solidification, ejector pins release the finished component. Sensors monitor temperature, pressure, position, and cycle timing.

In practical production, small changes can create visible defects. A slightly cold mold may leave flow marks. Excessive pressure can stress the part or damage the mold. Operators often adjust settings after inspecting the first samples. That judgment still matters, even with automated controls. I would not treat a stable cycle as a perfect one. Material moisture, ambient temperature, and mold wear can quietly change results over time.

What Is Plastic Injection Molding and How Does It Work?

Injection molding uses a heated barrel and screw to melt plastic pellets, inject the melt into a clamped mold, hold pressure while the part solidifies, and then eject the finished component.

Typical cycle-time distribution: Cooling usually takes the largest share of the cycle because the molded part must become rigid enough for safe ejection. Actual values vary with material, wall thickness, mold design, temperature, and machine settings.

How Plastic Pellets Become Molded Parts Step by Step

What Is Plastic Injection Molding and How Does It Work?
How Plastic Pellets Become Molded Parts Step by Step

Plastic injection molding turns small polymer pellets into repeatable parts. The process starts with material inspection. Operators check pellet moisture, color, and contamination before loading a hopper. Some materials need drying in a controlled unit. Wet pellets can create bubbles, weak surfaces, or cloudy marks. Small details matter.

Inside the barrel, a rotating screw carries pellets forward. Heater bands soften the material gradually, while screw movement adds mixing and pressure. The molten plastic reaches the mold through a nozzle. The screw then pushes a measured shot into closed mold cavities. Pressure holds the plastic against cooled steel walls. Water channels remove heat until the part becomes rigid enough to eject. Ejector pins release it carefully.

The cycle repeats, often within seconds. Yet fast does not mean simple. Temperature, injection speed, cooling time, and mold alignment must work together. A small setting error can cause warping, sink marks, or short fills. In practice, technicians adjust one variable at a time and record the result. This method is slower, but more trustworthy. I would not treat a perfect first sample as proof of stable production. Material batches, room conditions, and tool wear can still change the outcome. The molded part needs measurement, visual inspection, and functional testing before approval.

What Is Plastic Injection Molding and How Does It Work? — How Plastic Pellets Become Molded Parts Step by Step
Step Process Stage What Happens Typical Operating Range or Fact Primary Purpose
1 Material Selection Thermoplastic pellets are selected according to the required strength, flexibility, heat resistance, chemical resistance, appearance, and intended use of the part. Common materials include ABS, polypropylene, polyethylene, polycarbonate, nylon, and acetal. Match the material properties with the product requirements and molding conditions.
2 Pellet Drying Moisture-sensitive materials are dried before processing. Excess moisture can cause bubbles, surface marks, brittleness, or reduced mechanical performance. Drying temperature and time depend on the polymer; hygroscopic materials commonly require controlled hot-air or desiccant drying. Reduce moisture-related defects and maintain consistent material quality.
3 Feeding Pellets are poured into the machine hopper and conveyed toward a heated barrel by a rotating screw. Pellet size is generally a few millimeters, although exact dimensions vary by material and supplier. Provide a continuous and controlled supply of plastic to the melting system.
4 Melting and Mixing Heat from the barrel and friction generated by screw rotation soften and melt the pellets. The screw also mixes the material and prepares a measured shot. Melt temperatures commonly range from approximately 180°C to 350°C, depending on the polymer. Create a homogeneous melt with the correct volume and temperature for injection.
5 Mold Closing Two mold halves close around the cavity. The clamping unit holds the mold shut against the pressure generated during injection. Clamping force is selected according to projected part area, material pressure, and mold design. Prevent the mold from opening and reduce flash along the parting line.
6 Injection The screw moves forward and pushes molten plastic through the nozzle, sprue, runners, and gates into the mold cavity. Injection pressure can range from roughly 50 MPa to more than 200 MPa, depending on part geometry and material. Fill the cavity quickly and reproduce the mold’s shape and surface details.
7 Packing and Holding After the cavity is filled, additional pressure is applied while the gate begins to freeze. This compensates for material shrinkage during cooling. Holding pressure and time are adjusted according to wall thickness, gate size, material, and part weight. Control dimensional accuracy, reduce sink marks, and improve part consistency.
8 Cooling The plastic remains inside the mold while cooling channels remove heat and the material becomes rigid enough for ejection. Cooling often represents the largest portion of the cycle time, especially for thick-walled parts. Stabilize the part and minimize warpage, distortion, and dimensional variation.
9 Mold Opening The clamping unit separates the mold halves after the cooling stage is complete. Mold-opening distance must provide enough clearance for safe and complete part removal. Expose the molded part and prepare the mold for ejection.
10 Part Ejection Ejector pins, sleeves, plates, or air assist push the solidified part away from the core side of the mold. Ejection force depends on shrinkage, draft angle, surface area, and mold texture. Remove the part without damaging its surfaces or critical features.
11 Runner and Gate Removal Material remaining in the sprue, runners, or gates is trimmed manually or separated by an automated system when required. Hot-runner molds can reduce or eliminate solidified runner waste compared with cold-runner systems. Produce a clean finished part and manage recyclable process scrap.
12 Inspection and Finishing Parts are checked for dimensions, appearance, weight, flash, short shots, sink marks, weld lines, and other defects. Additional operations may include assembly, printing, or surface treatment. Inspection criteria are defined by the part drawing, functional requirements, and applicable quality standards. Verify that the molded parts meet functional, dimensional, and visual requirements.
13 Cycle Repeat The screw retracts to prepare the next shot while the mold closes and the complete sequence repeats. Many thermoplastic molding cycles last from several seconds to several minutes, depending mainly on part size and wall thickness. Enable repeatable, high-volume production of identical parts.

Note: Actual temperatures, pressures, cooling times, cycle times, and dimensional results vary with the polymer grade, mold design, machine capacity, part geometry, and processing conditions.

How Mold Design Controls Shape, Detail, and Surface Quality

Plastic injection molding begins when heated resin fills a shaped cavity under pressure. The mold does more than define the product’s outline. It controls detail, strength, cooling behavior, and the final surface appearance.

A well-planned mold starts with uniform wall thickness. Thick sections cool slowly and may develop sink marks or internal stress. Draft angles help the part release cleanly without scuffing polished surfaces. Gate location also matters. A poorly placed gate can leave visible marks, uneven filling, or weld lines near a critical feature. Small vents allow trapped air to escape, especially around ribs, corners, and engraved details. Tiny changes matter.

Cooling channels deserve equal attention. Uneven cooling can bend a flat panel or distort a precise opening. Mold designers often adjust channel spacing around thicker areas to control temperature more evenly. Surface texture adds another layer of control. A matte texture can hide minor flow marks, while a polished cavity reflects every defect. It can be unforgiving.

Ejection design must protect both geometry and finish. Ejector pins placed near thin walls may create white stress marks or dents. In production reviews, a mold can appear perfect on a computer screen yet perform poorly on the press. That gap requires testing, measurement, and revision. Even experienced teams sometimes optimize appearance and overlook maintenance access. A better mold balances shape, detail, surface quality, cooling, and practical servicing.

What Factors Affect Production Efficiency and Part Quality

What Is Plastic Injection Molding and How Does It Work?

Plastic injection molding melts plastic pellets and pushes the material into a shaped mold. After cooling, the solid part is ejected and inspected. Production efficiency depends on more than machine speed. Mold design, material selection, heating stability, and cooling time all interact. A cycle that is too fast may create warping, sink marks, or incomplete filling.

Mold temperature needs close control. Uneven cooling can leave visible stress near corners and thick sections. Proper gate placement also improves filling balance and reduces weld lines. Operators should monitor pressure, screw movement, cycle time, and part weight during production. Small weight changes can reveal material shortages or process drift before defects become obvious.

Clean equipment and consistent raw materials support reliable results. Moisture-sensitive plastics may need careful drying before molding. Poorly dried material can produce bubbles, weak surfaces, or brittle areas. Still, perfect settings rarely appear immediately. Experienced teams often adjust one variable at a time, record the result, and question assumptions. That discipline matters. A minor shortcut in setup may save minutes, yet create hours of rework later. Human inspection remains useful, although it can miss defects under changing light. Process data and physical checks should work together.

Go to Top